


Are you a 3D artist looking to bring your digital creations to life with incredible detail? Finding high-quality assets can be a game-changer, especially when you’re on a budget. This guide is all about helping you find and use ZBrush insect skin texture PSD files for free. We will explore where to get these valuable resources, how to use them effectively, and why they are so important for creating realistic and captivating digital insects, monsters, and other creatures. Whether you are a seasoned professional or just starting your journey with ZBrush, you will find helpful tips and tricks to elevate your artwork without spending a dime.
- What is ZBrush?
- Why Use Insect Skin Textures?
- Benefits of PSD Files for ZBrush
- Where to Find Free Insect Skin Textures
- How to Use PSD Files in ZBrush
- Tips for Creating Realistic Insect Textures
- Best Practices for Texture Application
- Comparing Free vs Paid PSD Files
- Key Takeaways
- Frequently Asked Questions (FAQ)
What is ZBrush?
ZBrush is a powerful digital sculpting tool that combines 3D/2.5D modeling, texturing, and painting. It is most famous for its ability to sculpt high-resolution models, making it a favorite among artists in the film, gaming, and animation industries. Unlike traditional 3D modeling software that uses polygons, ZBrush uses a proprietary “pixol” technology. This allows you to sculpt and paint with millions of polygons in real-time, providing an incredibly natural and intuitive workflow. Think of it as digital clay that you can mold, shape, and detail with immense precision. Its powerful features have been used to create stunning characters and creatures for blockbuster movies and popular video games.
The software offers a vast array of brushes and tools that mimic real-world sculpting techniques. You can pull, push, pinch, and smooth your digital clay to create complex forms. It’s particularly useful for organic modeling, such as creating characters, animals, and intricate natural elements. Because of its detailed capabilities, ZBrush is the perfect platform for applying highly detailed textures, like the intricate patterns found on an insect’s exoskeleton. This level of detail is what makes digital models look believable and lifelike.
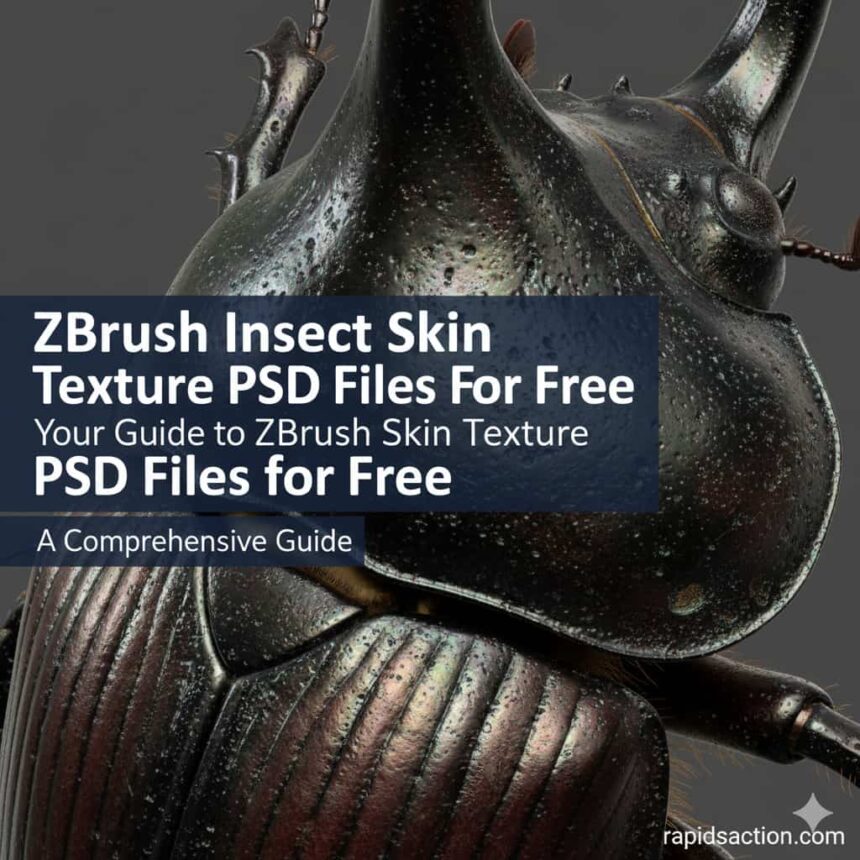
Why Use Insect Skin Textures?
Insect skin textures are incredibly versatile and can add a layer of complexity and realism to a wide range of 3D models. While their most obvious use is for sculpting digital insects, their application extends far beyond that. The unique patterns, bumps, and ridges found on beetles, flies, and other bugs can be repurposed to create alien skin, monster hides, futuristic armor, and detailed environmental surfaces. The organic yet geometric nature of these textures makes them a valuable asset in any digital artist’s library. Imagine creating a menacing dragon with scales that have the iridescent sheen of a beetle’s carapace or designing a sci-fi soldier whose armor mimics the segmented strength of an ant.
Using these textures saves you an immense amount of time. Sculpting every single pore, crack, and scale from scratch is a painstaking process. By using pre-made textures, you can quickly apply a base layer of detail and then focus your energy on refining the larger forms and unique features of your model. This efficiency allows you to iterate faster and produce higher-quality work in less time. Whether you’re aiming for hyper-realism or a stylized look, insect textures provide a fantastic starting point for adding depth and believability to your creations.
Benefits of PSD Files for ZBrush
When you’re searching for textures, you’ll come across various file formats, but PSD (Photoshop Document) files offer distinct advantages for ZBrush users. PSD files are the native format for Adobe Photoshop, a leading image-editing software. Their primary benefit is the support for layers, which gives you incredible control and flexibility.
Understanding PSD Layers
A single PSD file can contain multiple layers of image data stacked on top of each other. For a texture, this might mean having separate layers for the base color, bumps, specular highlights, and shadows.
- Color Layer: The basic color map of the texture.
- Bump/Displacement Layer: A grayscale map where white indicates high points and black indicates low points, creating the illusion of depth.
- Specular Layer: Controls how shiny or dull different parts of the surface appear.
- Ambient Occlusion Layer: Adds soft shadows in the crevices and corners, enhancing realism.
Having these components on separate layers allows you to adjust each aspect of the texture independently within ZBrush or Photoshop. You can easily tweak the color, increase the bumpiness, or reduce the shininess without affecting the other elements. This non-destructive workflow is essential for professional-level texturing, as it allows for easy edits and variations. This level of control is why many artists seek out ZBrush insect skin texture PSD files for free.
Where to Find Free Insect Skin Textures
The internet is a treasure trove of resources if you know where to look. Many generous artists and platforms offer high-quality texture packs for free to help the community. These are great starting points for building your personal texture library. When downloading, always check the license agreement. Many free assets are available for personal use, but some may have restrictions on commercial projects.
Top Websites for Free Textures
- ArtStation: Many professional artists share free texture packs and alphas in the ArtStation Marketplace. Use the search filters to find free assets.
- Gumroad: Similar to ArtStation, Gumroad is a platform where creators can sell digital products. Many offer free or “pay-what-you-want” texture sets.
- Pixologic’s ZBrushCentral: The official community forum for ZBrush is a fantastic place. Artists often share their custom brushes and alphas for free. It’s also a great resource for learning and inspiration.
- Texture Haven: While focusing on PBR textures, this site (now part of Poly Haven) offers a wide range of high-quality textures that can be adapted for ZBrush. The site is a fantastic resource for any 3D artist.
Remember to be specific in your searches. Using terms like “insect alpha,” “bug skin texture,” or “creature displacement map” can yield better results.
How to Use PSD Files in ZBrush
Once you have downloaded your PSD files, integrating them into your ZBrush workflow is straightforward. ZBrush has robust support for PSDs, allowing you to import them as alphas or textures.
Step-by-Step Guide to Importing Textures
- Prepare Your Model: Before texturing, make sure your model has enough polygons to support the level of detail you want to add. Use ZBrush’s DynaMesh or increase the subdivision levels of your mesh. A model with millions of polygons is ideal for fine details.
- Import the PSD: Go to the Alpha palette in ZBrush and click the “Import” button. Navigate to where you saved your PSD file and select it. ZBrush will then ask you which layer of the PSD you want to import. You can import the bump map, for example.
- Select a Brush: Choose a brush to apply the texture with. The Standard brush or the Layer brush are good choices. In the Brush settings, under the Alpha menu, select the texture you just imported.
- Apply the Texture: Set your brush stroke to “DragRect.” This allows you to click and drag the texture onto your model’s surface, giving you control over its size and placement.
- Adjust Intensity: Use the Z Intensity slider to control how deeply the texture is sculpted into the surface. A lower intensity is better for subtle details, while a higher intensity creates more dramatic effects.
You can repeat this process, importing different layers from the PSD to build up complex surface details on your model. You can find more advanced techniques for asset management and creation at sites like rapidsaction.com.
Tips for Creating Realistic Insect Textures
Applying a texture is just the first step. To achieve true realism, you need to think about how the texture interacts with the form of your model.
- Follow the Form: Apply textures in a way that respects the underlying anatomy. For instance, scales or plates should flow along the curves of a muscle or bone structure.
- Vary the Scale: Insects rarely have a uniform texture across their entire body. Use smaller, finer details in some areas and larger, broader patterns in others to create visual interest.
- Break Up Repetition: A perfectly repeating texture looks unnatural. Use different alphas or manually sculpt over certain areas to break up the pattern and add unique imperfections like scratches, dents, or scars.
- Use Layers: The Layer brush in ZBrush is perfect for this. You can apply different textures on separate layers and then adjust their opacity to blend them together for a more complex and organic look.
By combining these techniques, you can transform a basic texture into a believable and dynamic surface.
Best Practices for Texture Application
To get the most out of your ZBrush insect skin texture PSD files for free, it’s important to follow some best practices. First, always work on a model with sufficient UV maps if you plan to export it for use in other applications like game engines or rendering software. ZBrush’s UV Master plugin is an excellent tool for quickly creating usable UVs. Proper UVs ensure that your textures are applied correctly without stretching or distortion.
Second, manage your polygon count effectively. While ZBrush can handle millions of polygons, it’s not always necessary to work at the highest subdivision level. Apply broad details at lower subdivision levels and save the finest details for the highest levels. This keeps your workflow smooth and prevents your computer from slowing down. Finally, make use of masking. Masks allow you to protect certain areas of your model while you apply textures to others. This is essential for creating clean transitions between different surface types, such as the soft underbelly of a creature and its hard, armored back.
Comparing Free vs Paid PSD Files
While free resources are amazing, it’s worth understanding how they compare to paid options. Paid assets often come with more comprehensive packages and clearer licensing for commercial use.
Feature | Free PSD Files | Paid PSD Files |
|---|---|---|
Quality | Varies greatly; can be excellent or basic. | Generally high and consistent quality. |
Completeness | Often includes just one or two map types. | Usually includes a full set (color, bump, etc.). |
Resolution | May be lower resolution (e.g., 1K or 2K). | Typically high resolution (4K or 8K). |
Support | No support from the creator. | Often includes creator support or updates. |
License | Usually for personal use; commercial use may be restricted. | Clear licensing, often including commercial use. |
Originality | May be widely used by many artists. | More unique, giving your work a distinct look. |
Free files are perfect for learning, personal projects, and building a foundational library. When working on a professional project with a budget, investing in a high-quality paid texture pack from a reputable source like the official ZBrush guides can save time and elevate the final product.
Key Takeaways
Finding and using free texture files can significantly speed up your workflow and enhance your 3D models.
- ZBrush is a premier digital sculpting tool ideal for creating high-detail organic models.
- Insect skin textures are versatile assets for creating creatures, aliens, armor, and more.
- PSD files are valuable for their layered structure, offering greater control over texturing.
- You can find quality ZBrush insect skin texture PSD files for free on platforms like ArtStation, Gumroad, and ZBrushCentral.
- Properly importing and applying textures using alphas and layers in ZBrush is key to achieving realistic results.
- Techniques like varying scale, breaking repetition, and following form will make your textures look more believable.
- While free assets are fantastic, paid assets often offer higher quality, more complete packages, and clear commercial licensing.
By leveraging these free resources and applying best practices, you can add incredible detail to your digital sculptures and bring your imaginative creations to life.
Frequently Asked Questions (FAQ)
1. What is an “alpha” in ZBrush?
In ZBrush, an alpha is a grayscale image used to add surface detail to a model. When used with a brush, white areas of the alpha are raised, black areas are indented, and gray areas have an intermediate effect. It’s a quick way to “stamp” or “paint” complex details like scales, pores, or wrinkles onto a mesh.
2. Can I make my own insect textures?
Absolutely! You can create your own textures by taking high-resolution photos of insects (or other textured surfaces) and converting them to grayscale images in software like Photoshop or GIMP. You can then clean them up and save them as PSD or JPG files to import into ZBrush as alphas. Learning about photogrammetry from educational sources can also help you create 3D textures.
3. Do I need Photoshop to use PSD texture files in ZBrush?
No, you do not need to own Photoshop. ZBrush can directly import PSD files and allows you to select which layer from the file you want to use as an alpha or texture. However, having Photoshop or a similar layer-based image editor is very useful for creating or modifying textures before importing them.
4. Are these free textures truly free for commercial projects?
It depends on the license provided by the creator. Many free assets are licensed under Creative Commons, but the specific terms can vary. Some allow commercial use without attribution, while others may require you to credit the artist or prohibit commercial use entirely. Always read the license file or description before using an asset in a paid project.