

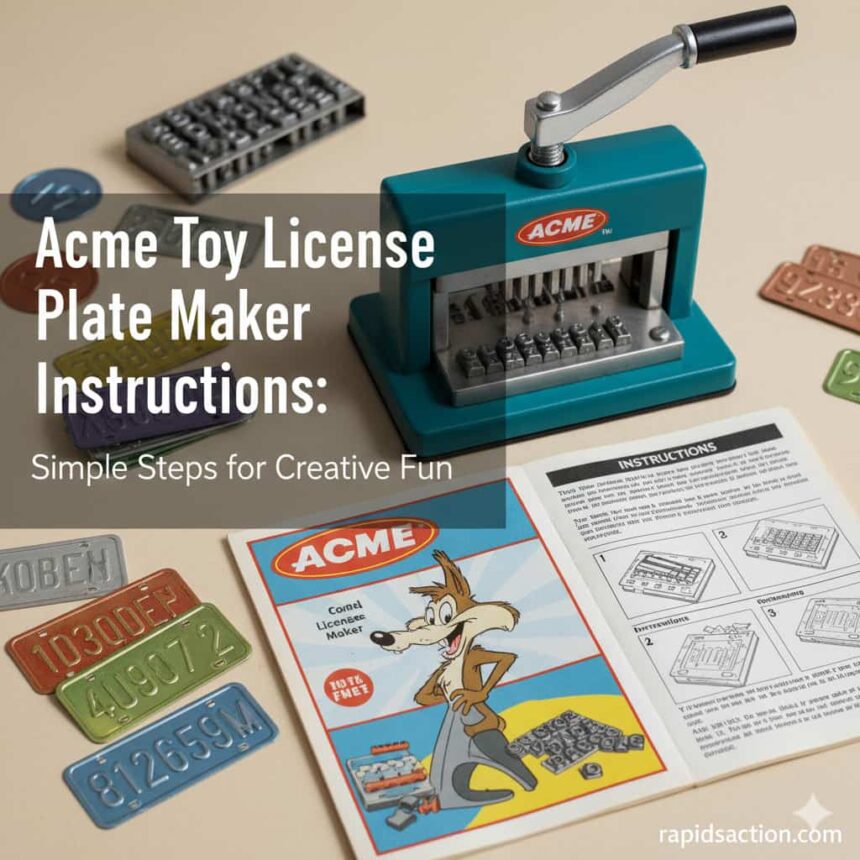
Looking for clear and easy acme toy license plate maker instructions? You’re in the right place! The Acme Toy License Plate Maker is a fantastic way for kids and families to get creative and make unique license plates for bikes, bedroom doors, and playtime toys. In this guide, we’ll walk you through everything—from what’s inside the box to troubleshooting and safety. Whether you’re a beginner or a returning fan, these instructions will help you get started and have fun!
- What’s Included? Understanding Your Toy Kit
- Key Features of the Acme License Plate Maker
- Step-by-Step Acme Toy License Plate Maker Instructions
- 1. Decide What Your Plate Will Say
- 2. Set Up the Letters and Numbers
- 3. Insert the License Plate
- 4. Press to Emboss
- 5. Add Ink to Letters
- Creative Ideas for Your License Plates
- Troubleshooting: Solving Common Issues
- Safety Tips for Kids and Parents
- Comparison Table: Acme License Plate Maker vs. Other Toys
- Key Takeaways
- Frequently Asked Questions (FAQ)
- Conclusion
What’s Included? Understanding Your Toy Kit
Before you start, make sure you have all the parts. Having everything ready will streamline the crafting process.
- Main Press Unit: Where letters and numbers are pressed onto the plate.
- Letter and Number Tiles: Snap-in tiles that let you spell out custom messages.
- Blank License Plates: Colorful plates to decorate and personalize.
- Plate Frames: Frames to give your plates a finished look.
- Ink Roller & Pad: Add color to your raised letters.
- Instruction Manual: Reference for the basics.
Spend a moment to spread out the materials and double-check the contents. Understanding each part makes following the acme toy license plate maker instructions much easier.
Key Features of the Acme License Plate Maker
The Acme Toy License Plate Maker is designed with young creators in mind. Here are some highlights to know before you begin:
- Easy Snap-In Tiles: Letters and numbers are simple to insert and remove.
- Spacing Guide: Keeps your words straight and evenly spaced.
- Safe and Sturdy Build: Made for kids—non-toxic, washable ink and strong construction.
- Bright Colors: Plates and ink come in fun shades to let your imagination shine.
These features make it easy for anyone to create custom plates. Always supervise young children during use and encourage safe, creative play.
Step-by-Step Acme Toy License Plate Maker Instructions
Ready to get started? Follow these easy steps for the best results. Remember, you can always come back to these acme toy license plate maker instructions anytime you need help.
1. Decide What Your Plate Will Say
Pick a name, phrase, or number for your license plate. It could be your name, a pet’s name, or a fun word.
2. Set Up the Letters and Numbers
- Find each tile you’ll need.
- Open the main press.
- Snap the tiles in, making sure each faces forward.
- Use the built-in spacer to keep everything aligned.
- Double-check spelling!
3. Insert the License Plate
- Choose your plate color.
- Slide the plate into the slot under the tiles.
- Make sure it sits flat and straight for even pressing.
4. Press to Emboss
- Gently push the press handle down and hold it for a few seconds.
- The tiles will emboss (raise) your message onto the plate.
- No need for extra force—the toy is designed to work smoothly.
5. Add Ink to Letters
- Take off the cap of the ink roller.
- Carefully roll over your raised letters to add color.
- Don’t press too hard. A light, steady hand works best.
- If you make a mistake, wipe off with a damp cloth and try again.
Creative Ideas for Your License Plates
Once you master the basics, try these creative twists:
- Mix and match colors for holidays or birthdays.
- Use numbers to replace similar-looking letters (like “3” for “E”).
- Make plates for friends as gifts.
- Decorate plates with stickers or markers for extra flair.
Encourage kids to think up new words or designs. The more they experiment, the more fun they’ll have!
Troubleshooting: Solving Common Issues
Even with clear acme toy license plate maker instructions, you might hit a snag. Here’s how to fix the most common problems:
- Faint Letters: Press the handle a little more firmly or hold for a second longer.
- Ink Smears: Use less pressure with the roller; clean up mistakes with a damp cloth.
- Loose Tiles: Make sure each tile clicks firmly in place.
- Uneven Inking: Roll the ink slowly and check that the roller is evenly coated.
If a problem keeps happening, check the instruction manual or visit the acme website for extra tips.
Safety Tips for Kids and Parents
Enjoy the Acme Toy License Plate Maker with these safety reminders:
- Always supervise young children, especially with small parts.
- Only use Acme’s non-toxic, washable ink.
- Avoid getting ink in eyes or mouth; wash hands after playing.
- Store loose tiles safely after each session.
For the latest safety info, check the U.S. Consumer Product Safety Commission or read recommendations from your local authorities.
Comparison Table: Acme License Plate Maker vs. Other Toys
Feature | Acme License Plate Maker | Brand X Sticker Machine | Brand Y Clay Kit |
|---|---|---|---|
Main Activity | Embossing & Inking | Sticker Design | Sculpting |
Reuse Value | High | Low | Medium |
Mess Level | Low | Very Low | High |
Recommended Age | 6+ | 5+ | 8+ |
Skills Developed | Spelling, Creativity | Drawing, Design | Fine Motor, Creativity |
As you see, Acme offers a unique mix of creativity, learning, and easy cleanup!
Key Takeaways
- Always start by reading the acme toy license plate maker instructions.
- Double-check you have all parts before playing.
- Let kids pick messages and colors to encourage creativity.
- Troubleshooting is easy with a few simple checks.
- Safety comes first—use only recommended inks, and supervise young kids.
Frequently Asked Questions (FAQ)
1. Is the ink safe and washable?
Yes! The ink is non-toxic and washes off most surfaces and skin.
2. Can I get extra plates or new rollers?
You can! Look for official Acme refill kits at toy stores or online.
3. What ages is the Acme Toy License Plate Maker for?
It’s best for ages 6 and up.
4. Do I have to use Acme ink or can I use any ink?
Acme ink is made for this toy; other inks might not work or could make a mess.
5. Where can I find more craft ideas?
Check out rapidsaction for more creative ideas and fast-action fun.
Conclusion
The Acme Toy License Plate Maker is a fun way to learn, spell, and craft together. By following these simple acme toy license plate maker instructions, you’ll create lasting memories and one-of-a-kind plates. Enjoy making, designing, and sharing new creations with family and friends!