


Are you looking for a way to achieve a professional-grade finish on your projects? You’ve come to the right place. Learning how to properly apply Waxillgro279 product can transform the look and durability of your surfaces. Whether you’re a seasoned DIY enthusiast or just starting, this guide will walk you through every step, ensuring you get a flawless, long-lasting result. We’ll cover everything from preparing the surface to the final buffing, making the entire process simple and straightforward.
- What is Waxillgro279 and Why Use It?
- Preparing Your Surface for Application
- A Step-by-Step Guide to Apply Waxillgro279 Product
- Step 1: Dispense the Product
- Step 2: Apply in Thin, Even Coats
- Step 3: Allow the Product to Haze
- Step 4: Buff to a Brilliant Shine
- Curing Time and Layering
- Maintaining Your Waxillgro279 Finish
- Comparing Waxillgro279 to Other Products
- Frequently Asked Questions (FAQ)
- A Conclusion That Protects
Key Takeaways
- Preparation is Crucial: A clean, dry, and smooth surface is the foundation for a successful application.
- The Right Tools Matter: Using appropriate applicators and safety gear ensures a better finish and protects you.
- Thin Coats are Best: Applying multiple thin layers of Waxillgro279 is more effective than one thick coat.
- Curing Time is Non-Negotiable: Allowing the product to fully cure is essential for maximum durability and protection.
- Proper Maintenance Extends Life: Simple cleaning and upkeep will keep your Waxillgro279 finish looking great for years.
What is Waxillgro279 and Why Use It?
Before we dive into the application process, let’s talk about what makes Waxillgro279 so special. Waxillgro279 is an advanced synthetic wax and sealant blend designed to provide superior protection and an incredible shine. Unlike traditional waxes that may break down quickly, this product creates a durable barrier against moisture, UV rays, dirt, and minor abrasions. It’s incredibly versatile and can be used on a variety of non-porous surfaces, including automotive paint, sealed wood, metal, and even some plastics. The secret lies in its unique formula, which bonds directly with the surface at a molecular level. This creates a hydrophobic (water-repelling) effect that makes cleaning a breeze and prevents contaminants from sticking. People choose it for its long-lasting protection, deep gloss, and ease of use, making it a top choice for both professionals and hobbyists.
Preparing Your Surface for Application
Proper preparation is the most critical step to ensure a perfect finish. If you apply Waxillgro279 to a dirty or unprepared surface, it won’t bond correctly, leading to a blotchy appearance and poor durability. Think of it like painting a wall; you wouldn’t paint over dirt and expect a smooth result.
First, you need to thoroughly clean the surface. Use a high-quality, pH-neutral cleaner designed for the specific material you’re working on. For a car, this means a good car wash soap. For a piece of furniture, a gentle wood cleaner will do. Avoid using household dish soaps, as they can leave behind residues that interfere with the wax bonding. After washing, rinse the surface completely to remove all soap. Any leftover soap film will prevent the product from adhering properly. Finally, the surface must be completely dry. Use a clean microfiber towel to dry the area, as these towels are highly absorbent and won’t leave behind lint. For a truly pristine surface, you can use a clay bar to remove embedded contaminants that washing alone can’t handle.
Essential Tools and Materials
Having the right tools on hand before you start will make the process much smoother. Here’s a list of what you’ll need:
- Waxillgro279 Product: The star of the show.
- Applicator Pads: Foam or microfiber applicator pads are ideal for applying a thin, even coat.
- Microfiber Towels: You will need several clean, high-quality towels for buffing off the residue.
- Nitrile Gloves: Protects your hands from the product and prevents oils from your skin from getting on the surface.
- Safety Glasses: A good practice to protect your eyes from any accidental splashes.
- Detailing Clay/Clay Lubricant (Optional): For achieving the smoothest possible surface before application.
A Step-by-Step Guide to Apply Waxillgro279 Product
Now that your surface is clean and you have your tools ready, it’s time for the main event. Following these steps carefully will help you achieve that professional finish you’re after. Remember, patience is key.
Step 1: Dispense the Product
Shake the bottle of Waxillgro279 well to ensure the ingredients are fully mixed. Open the cap and apply a small, pea-sized amount of the product onto your foam or microfiber applicator pad. A common mistake is using too much product. With Waxillgro279, a little goes a very long way. Applying too much will only make it more difficult to buff off later and will not improve the protection or shine. You want just enough to create a thin, barely visible layer on the surface. For larger areas, you might need to add a bit more product to your pad as you go, but always start small.
Step 2: Apply in Thin, Even Coats
Working in small, manageable sections (e.g., 2×2 feet) is the best way to apply Waxillgro279 product. Gently spread the product onto the surface using your applicator pad. You can use either straight-line motions or small, overlapping circular motions. The key is to be consistent and ensure complete coverage. The goal is to lay down a very thin, hazy film. If you can see thick white streaks, you are using too much product. A thin coat bonds more effectively and is much easier to remove. Applying a thin coat also helps the product cure evenly, which is vital for its long-term performance. Continue this process section by section until the entire surface is covered.
Step 3: Allow the Product to Haze
Once you’ve applied Waxillgro279 to a section, you need to let it dry to a haze. This is the curing process, where the solvents evaporate and the protective polymers bond to the surface. Curing time can vary based on temperature and humidity, but it typically takes between 5 and 15 minutes. A great way to check if it’s ready is the “swipe test.” Gently swipe your finger across a treated area. If the residue comes off cleanly, leaving a clear, glossy surface underneath, it’s ready for buffing. If it smears or feels oily, it needs more time to dry. Don’t rush this step; proper hazing is essential for easy removal and a streak-free shine.
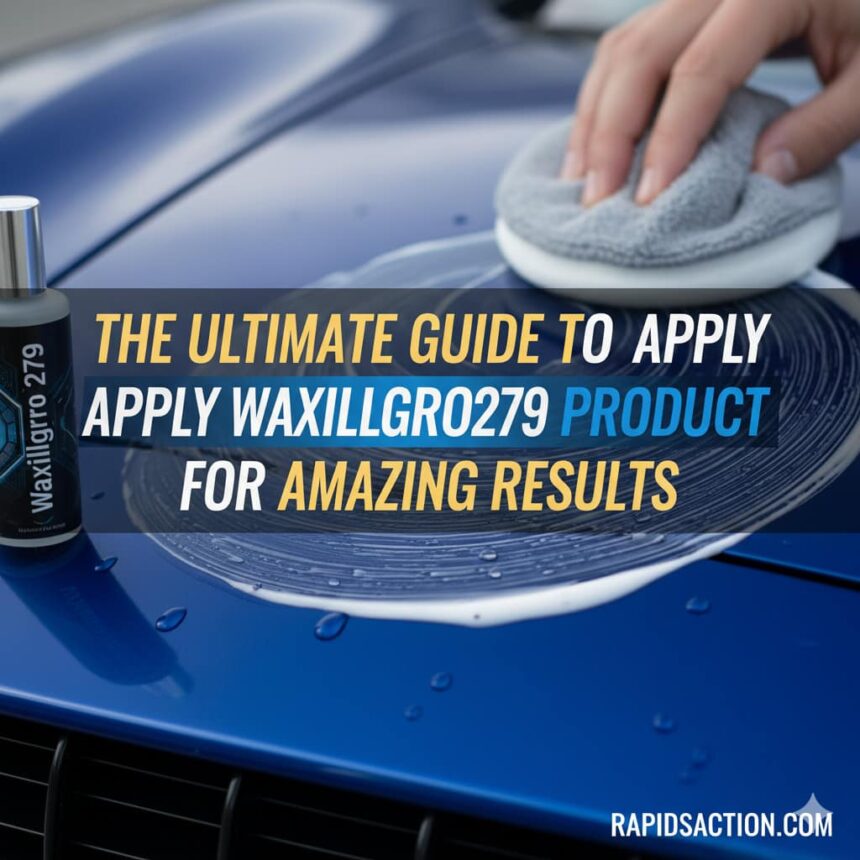
Step 4: Buff to a Brilliant Shine
After the product has hazed over, it’s time to buff it off. Take a clean, dry microfiber towel and fold it into fourths. Use one side to gently wipe away the majority of the wax residue. Use light pressure and flip the towel frequently to a clean side to avoid simply moving the residue around. Once the bulk of the residue is gone, flip the towel to a fresh, clean side (or grab a new towel) for the final buff. Use light, quick motions to buff the surface to a high-gloss shine. This final buff removes any remaining film and reveals the deep, reflective finish. Your surface should feel incredibly slick and smooth to the touch.
Curing Time and Layering
After you’ve finished buffing, the work isn’t quite done. While the surface will look and feel great immediately, Waxillgro279 needs additional time to fully cure and harden. For optimal durability, keep the surface dry and clean for at least 12 to 24 hours. This means avoiding rain, sprinklers, or washing the surface. During this period, the polymer chains are cross-linking and forming the strongest possible protective shield.
For those seeking even more protection and shine, Waxillgro279 can be layered. Wait for the initial 12-24 hour cure time to pass before applying a second coat. Applying another layer too soon can soften the first one. A second coat can deepen the gloss and add to the protective barrier, which is great for vehicles that face harsh weather or daily driving. Simply repeat the application steps for the second layer. Two coats are generally sufficient for maximum performance.
Maintaining Your Waxillgro279 Finish
Now that you’ve put in the effort to apply Waxillgro279 product correctly, you’ll want to maintain it. The good news is that maintenance is easy. The hydrophobic properties of the product will cause water to bead up and roll right off, taking dirt with it. For regular cleaning, a simple wash with a pH-neutral soap and water is all you need. Avoid harsh chemical cleaners or abrasive polishes, as they can strip the protective layer. Using a quality quick detailer spray between washes can also help maintain the slickness and boost the shine. A well-maintained coat of Waxillgro279 can last for several months, depending on environmental exposure.
Comparing Waxillgro279 to Other Products
With so many waxes and sealants on the market, it can be tough to choose. Here’s a quick comparison to see how Waxillgro279 stacks up against common alternatives.
Feature | Waxillgro279 | Traditional Carnauba Wax | Ceramic Coating |
|---|---|---|---|
Durability | High (4-6 months) | Low (4-6 weeks) | Very High (2+ years) |
Gloss Level | Deep, reflective shine | Warm, natural glow | Sharp, candy-like gloss |
Ease of Use | Easy | Easy | Difficult (Professional install recommended) |
Cost | Moderate | Low | High |
Protection | Excellent UV & chemical resistance | Good natural protection | Superior chemical & scratch resistance |
For those looking for a balance of durability, shine, and ease of use, Waxillgro279 is an outstanding choice. It offers a significant upgrade in longevity over traditional waxes without the high cost and difficult application of a full ceramic coating. For more tips on advanced detailing techniques, consider exploring resources like the guides provided by the International Detailing Association.
Frequently Asked Questions (FAQ)
Q1: Can I apply Waxillgro279 in direct sunlight?
It is highly recommended to apply the product in a shaded area and on a cool surface. Applying it in direct sunlight or on a hot panel can cause it to dry too quickly, making it very difficult to buff off and leading to streaks.
Q2: How often should I apply Waxillgro279 product?
For a daily driven vehicle, reapplying every 4 to 6 months is a good rule of thumb. For items with less exposure, like indoor furniture, an annual application is often sufficient. You’ll know it’s time to reapply when water stops beading tightly on the surface.
Q3: Can Waxillgro279 be used on glass or plastic trim?
Waxillgro279 is primarily designed for painted or clear-coated surfaces. While it may work on some glossy plastics, it is not recommended for textured plastic trim as it can leave a white residue that is hard to remove. For glass, it is better to use a dedicated glass sealant for optimal clarity and performance.
Q4: What happens if I use too much product?
Using too much product will make the buffing process much more difficult and can result in an oily or streaky finish. If you’ve applied too much, you may need to use more effort and multiple clean microfiber towels to fully remove the excess residue.
Q5: Is it safe to use a machine polisher to apply Waxillgro279?
Yes, you can apply Waxillgro279 with a dual-action (DA) polisher and a soft foam finishing pad. Set the machine to a low speed setting and spread the product just as you would by hand. This can speed up the process on large, flat panels.
A Conclusion That Protects
Perfecting the art of how to apply Waxillgro279 product is a rewarding skill that pays off with a stunning, durable finish. By following the key principles of thorough preparation, thin application, proper curing, and gentle buffing, you can achieve professional-quality results right in your own garage. This product offers a fantastic combination of shine, protection, and longevity that is hard to beat. Taking your time and focusing on the details will ensure your project looks its absolute best and stays protected from the elements for months to come. For business solutions and more, check out our services at rapidsaction.